| IMPORTANT
To prevent the pyrotechnic components from being
permanently deactivated or triggered (airbags or
pretensioners), wait for at least 3 minutes after disconnecting
the battery. |
| IMPORTANT
Never handle the pyrotechnic systems (pretensioners
or airbags) near to a source of heat or naked
flame - they may be triggered. |
REMOVAL
I - REMOVAL PREPARATION OPERATION
- Disconnect the battery (see Battery : Removal -
Refitting) (80A, Battery).
- Remove:
- the front door sill lining (see 71A, Body internal
trim, Front door sill lining: Removal - Refitting,
page 71A-7) ,
- the rear door sill lining (see 71A, Body internal
trim, Rear door sill lining: Removal - Refitting,
page 71A-8) ,
- the A-pillar trim (see 71A, Body internal trim, A-pillar
trim: Removal - Refitting, page 71A-10) ,
- the B-pillar trim (see 71A, Body internal trim, B-pillar
trim: Removal - Refitting, page 71A-14) ,
- the B-pillar upper trim (see 71A, Body internal
trim, B-pillar upper trim: Removal - Refitting,
page 71A-12) ,
- the C-pillar lower trim (see 71A, Body internal
trim, C-pillar lower trim: Removal - Refitting,
page 71A-9) ,
- the C-pillar upper trim (see 71A, Body internal
trim, C-pillar upper trim: Removal - Refitting,
page 71A-15) ,
- the sunroof opening control (depending on equipment
level) (see Sunroof opening control: Removal
- Refitting) (52A, Non-side opening
element mechanisms),
- the interior rear-view mirror (see Interior rear-view
mirror Removal - Refitting) (57A, Interior equipment),
- the sun visor (see Sun visor: Removal - Refitting)
(57A, Interior equipment),
- the grab handle (see Grab handle: Removal - Refitting)
(57A, Interior equipment).
II - OPERATION FOR REMOVAL OF PART
CONCERNED
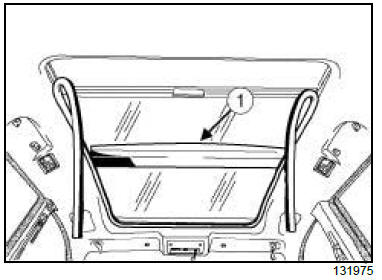
- Remove:
- the centre headlining (1) ,
- the sunroof seal carefully (depending on equipment
level).
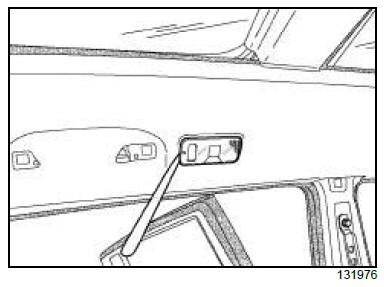
- Remove the individual light.
- Disconnect the power supply connector.
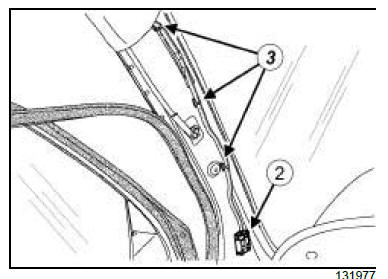
- Disconnect the power supply connector (2) .
- Unclip the clips (3) .
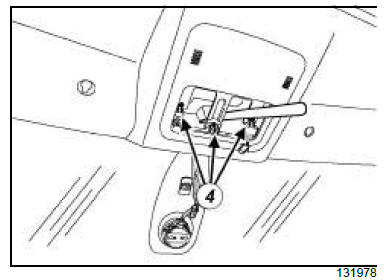
- Unclip the front section at (4) of the headlining using
the (Car. 1597).
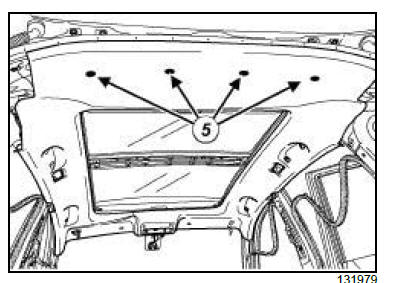
- Remove:
- the clips (5) ,
- the upper section of the front side door seal, partially,
- the upper section of the rear side door seal, partially.
- Pull on the headlining and remove it via the rear of
the vehicle (this operation requires two people).
REFITTING
I - REFITTING OPERATION FOR PART
CONCERNED
- Position the headlining in the luggage compartment
(this operation requires two people).
| Note:
For vehicles equipped with a sunroof, the headlining
must be handled with care. The side edges
are weakened by the design of the sunroof. |
- Clip on the front section of the headlining.
- Fit the rear section of the headlining.
- Refit:
- the headlining clips (5) ,
- the clips (3) .
- Connect the supply connector (2) .
- Refit:
- the sunroof seal (depending on equipment level),
- the centre headlining.
II - FINAL OPERATION
- Refit:
- the grab handle (see Grab handle: Removal - Refitting)
(57A, Interior equipment),
- the interior rear-view mirror (see Interior rear-view
mirror Removal - Refitting) (57A, Interior equipment),
- the sun visor (see Sun visor: Removal - Refitting)
(57A, Interior equipment),
- the sunroof opening control (depending on equipment
level) (see Sunroof opening control: Removal
- Refitting) (52A, Non-side opening
element mechanisms),
- the C-pillar upper trim (see 71A, Body internal
trim, C-pillar upper trim: Removal - Refitting,
page 71A-15) ,
- the C-pillar lower trim (see 71A, Body internal
trim, C-pillar lower trim: Removal - Refitting,
page 71A-9) ,
- the B-pillar upper trim (see 71A, Body internal
trim, B-pillar upper trim: Removal - Refitting,
page 71A-12) ,
- the B-pillar trim (see 71A, Body internal trim, B-pillar
trim: Removal - Refitting, page 71A-14) ,
- the A-pillar trim (see 71A, Body internal trim, A-pillar
trim: Removal - Refitting, page 71A-10) ,
- the rear door sill lining (see 71A, Body internal
trim, Rear door sill lining: Removal - Refitting,
page 71A-8) ,
- the front door sill lining (see 71A, Body internal
trim, Front door sill lining: Removal - Refitting,
page 71A-7) .
- Connect the battery (see Battery : Removal - Refitting)
(80A, Battery).
|


