RIGHT-HAND DRIVE
REMOVAL
I - REMOVAL PREPARATION OPERATION
- Disconnect the battery (see Battery: Removal - Refitting)
(80A, Battery).
- Remove:
- the dashboard lower cover (see Dashboard: Removal
- Refitting) (57A, Interior equipment),
- the A-pillar air distribution duct (see Front footwell
air distribution duct: Removal - Refitting) (61A,
Heating system),
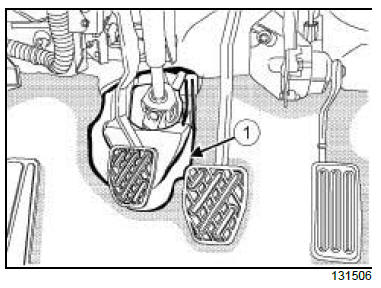
- Remove the steering cover (1) .
II - OPERATION FOR REMOVAL OF PART
CONCERNED
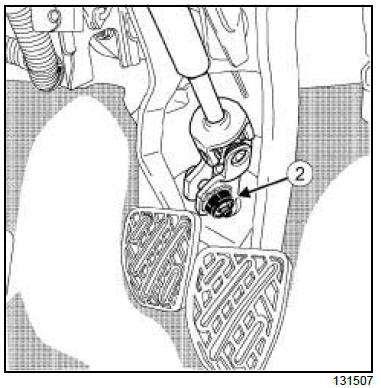
- Remove the cover (2) from the universal joint (do not
keep).
- Set the wheels straight ahead.
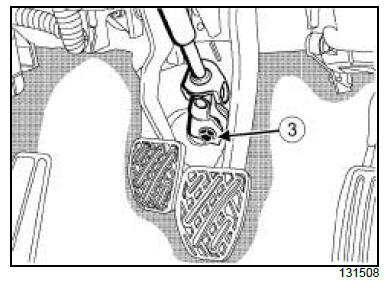
- Remove:
- the universal joint bolt (3) (do not keep),
- the universal joint nut,
- the universal joint.
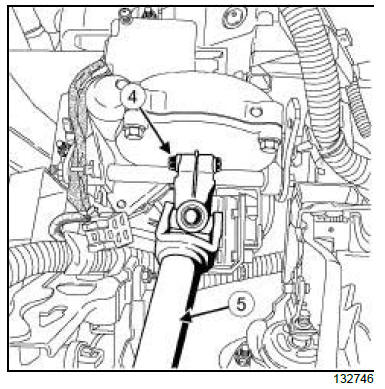
- Remove:
- the bolt (4) connecting the steering column to the
intermediate shaft,
- the intermediate shaft (5) .
REFITTING
I - REFITTING PREPARATION OPERATION
- Always replace the universal joint bolt.
II - REFITTING OPERATION FOR PART
CONCERNED
- Place the intermediate shaft in its initial position.
| Note:
Take care not to separate the two sliding parts of
the intermediate shaft. |
| Note:
On a new intermediate shaft, the universal joint
cam nut is prefitted; do not remove the cover. |
- Refit:
- the bolt from the universal joint,
- the intermediate shaft on the steering column.
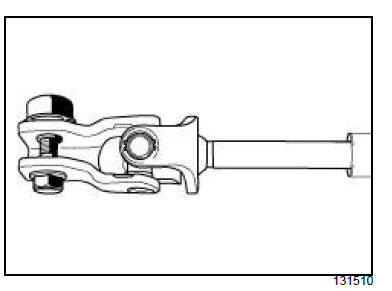
- Observe the direction of fitting for the universal joint
cam nut and bolt.
- Refit:
- the universal joint,
- the new universal joint bolt,
- the cam nut from the universal joint.
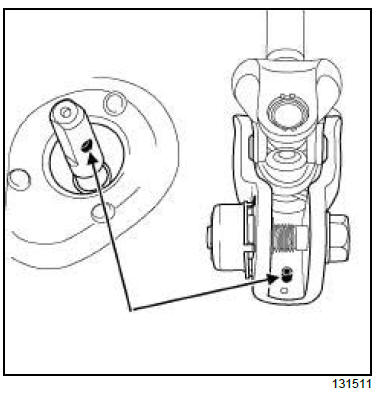
- Check that the universal joint is in the correct position.
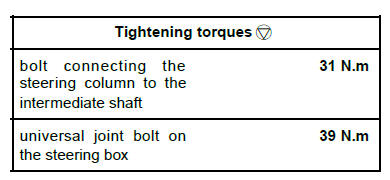
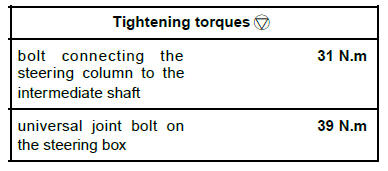
- Torque tighten:
- the bolt connecting the steering column to the
intermediate shaft (31 N.m),
- the universal joint bolt on the steering box (39
N.m).
III - FINAL OPERATION
- Refit:
- the steering column cover,
- the A-pillar air distribution duct (see Front footwell
air distribution duct: Removal - Refitting) (61A,
Heating system),
- the dashboard lower cover (see Dashboard: Removal
- Refitting) (57A, Interior equipment).
- Connect the battery (see Battery: Removal - Refitting)
(80A, Battery).
LEFT-HAND DRIVE
REMOVAL
I - REMOVAL PREPARATION OPERATION
- Disconnect the battery (see Battery: Removal - Refitting)
(80A, Battery).
- Remove:
- the dashboard lower cover (see Dashboard: Removal
- Refitting) (57A, Interior equipment),
- the A-pillar air distribution duct (see Front footwell
air distribution duct: Removal - Refitting) (61A,
Heating system).
II - OPERATION FOR REMOVAL OF PART
CONCERNED
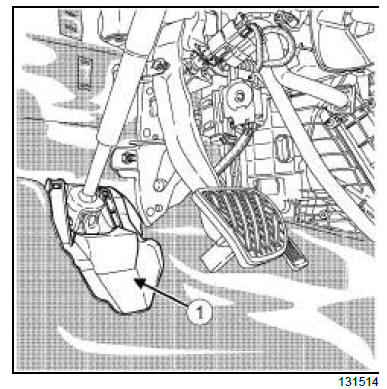
- Remove the steering cover (1) .
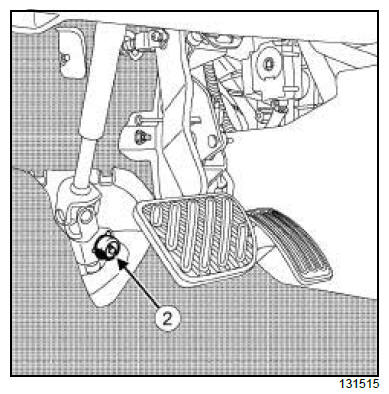
- Remove the universal joint cover (2) (do not keep).
- Set the wheels straight ahead.
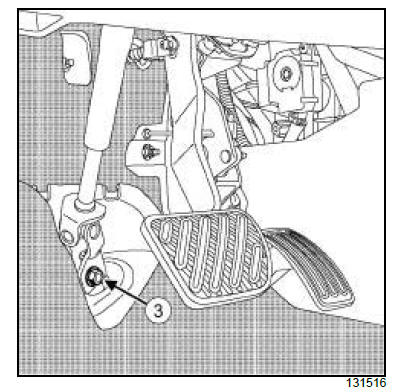
- Remove:
- the universal joint bolt (3) (do not keep),
- the universal joint nut (do not keep),
- the universal joint.
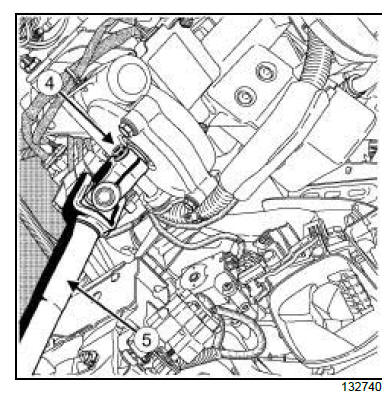
- Remove:
- the bolt (4) connecting the steering column to the
intermediate shaft,
- the intermediate shaft.
REFITTING
I - REFITTING PREPARATION OPERATION
- Always replace the universal joint bolt and nut after
each removal.
II - REFITTING OPERATION FOR PART
CONCERNED
- Place the intermediate shaft in its initial position.
| Note:
Take care not to separate the two sliding parts of
the intermediate shaft. |
| Note:
On a new intermediate shaft, the universal joint
cam nut is prefitted; do not remove the cover. |
- Refit:
- the intermediate shaft (5) on the steering column,
- the bolt from the universal joint.
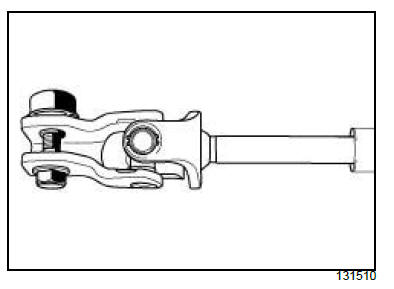
- Observe the direction of fitting for the universal joint
cam nut and bolt.
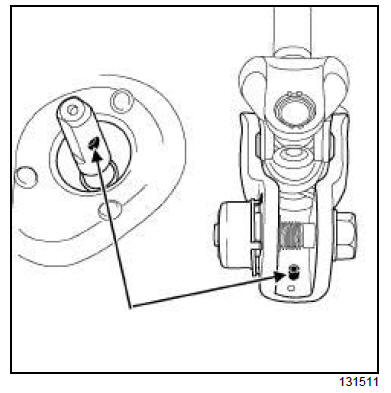
- Check that the universal joint is in the correct position.
- Refit:
- the universal joint,
- the new universal joint bolt,
- the new cam nut on the universal joint.
- Torque tighten:
- the bolt connecting the steering column to the
intermediate shaft (31 N.m),
- the universal joint bolt on the steering box (39
N.m).
III - FINAL OPERATION.
- Refit:
- the steering column cover,
- the A-pillar air distribution duct (see Front footwell
air distribution duct: Removal - Refitting) (61A,
Heating system),
- the dashboard lower cover (see Dashboard: Removal
- Refitting) (57A, Interior equipment).
- Connect the battery (see Battery: Removal - Refitting)
(80A, Battery).
|


