WITHOUT DISCHARGE LAMPS
REMOVAL
I - REMOVAL PREPARATION OPERATION
- Remove:
- the air inlet sleeve to access the left-hand headlight
bulbs (see Air filter unit: Removal - Refitting)
(12A, Fuel mixture),
- the windscreen washer bottle neck to access the
right-hand headlight bulbs (see 85A, Wiping -
Washing, Windscreen washer reservoir neck:
Removal - Refitting, page 85A-26) (85A, Wiping -
Washing).
II - REMOVAL OF PART CONCERNED
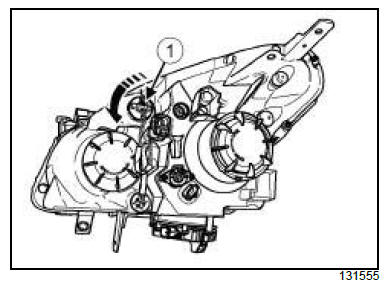
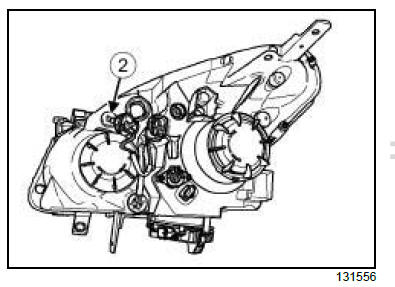
1 - Direction indicator bulb
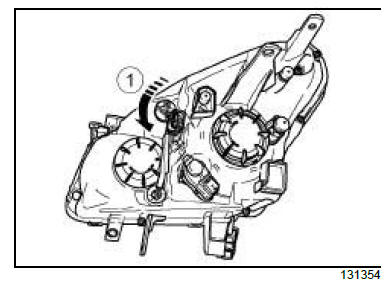
- Remove the bulb holder by turning it a quarter of a
turn anticlockwise (1) .
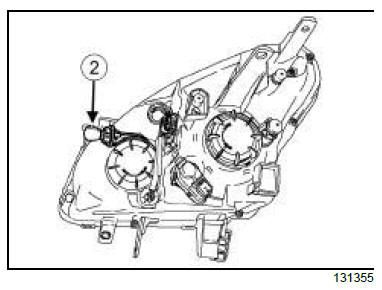
- Remove the bulb (2) from the bulb holder.
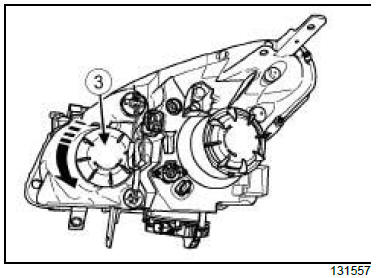
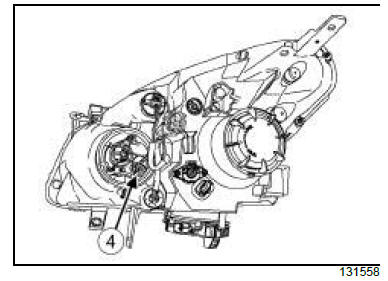
2 - Side light bulb
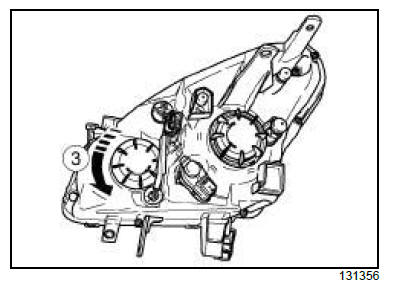
- Remove the sealing cover by turning it a quarter of a
turn anticlockwise (3) .
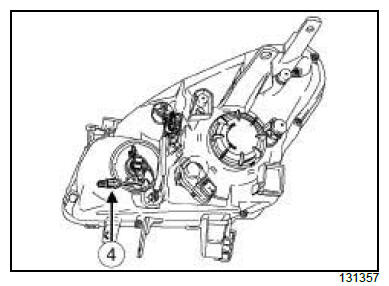
- Remove the bulb (4) from the bulb holder.
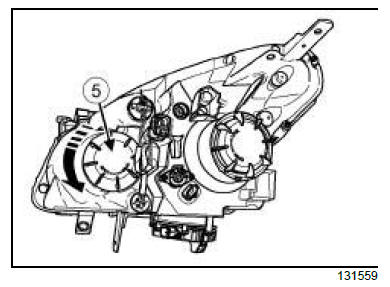
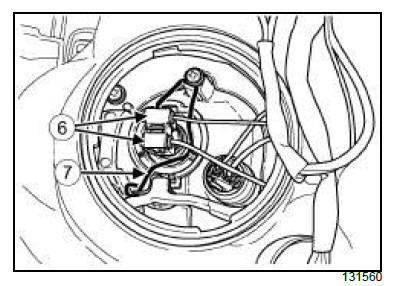
3 - Main beam headlight bulbs
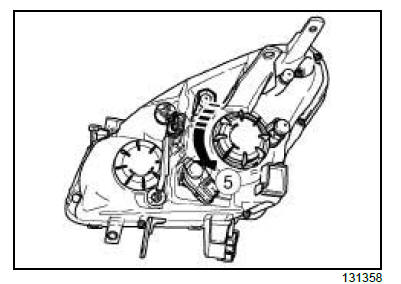
- Remove the sealing cover by turning it a quarter of a
turn anticlockwise (5) .

- Disconnect the connector from the main beam headlight
bulb (6) .
- Unfasten clip (7) .
- Remove the main beam headlight bulb.
4 - Dipped beam headlight bulb

- Remove the sealing cover by turning it a quarter of a
turn anticlockwise (8) .
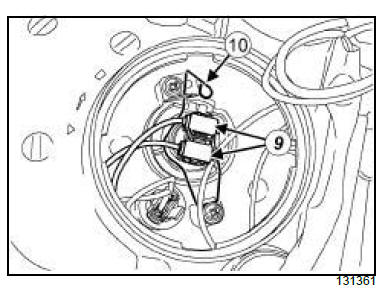
- Disconnect the connector from the dipped beam
headlight bulb (9) .
- Unfasten the clip (10) .
- Remove the dipped beam headlight bulb.
REFITTING
I - REFITTING PART CONCERNED
1 - Direction indicator bulb
- Refit:
- an approved PY21W bulb onto the direction indicator
bulb holder,
- the bulb holder on the headlight.
- Turn the bulb holder a quarter of a turn clockwise.
2 - Side light bulb
- Refit:
- an approved W5W bulb onto the side light bulb
holder,
- the bulb holder on the headlight.
- Refit the cover by turning it a quarter of a turn clockwise.
3 - Main beam headlight bulbs
- Refit an approved H7 bulb on the headlight.
- Clip the clip onto the headlight.
- Connect the connector to the main beam headlight
bulb.
- Refit the cover by turning it a quarter of a turn clockwise.
4 - Dipped beam headlight bulb
- Refit an approved H7 bulb on the headlight.
- Clip the clip onto the headlight.
- Connect the connector to the dipped beam headlight
bulb.
- Refit the cover by turning it a quarter of a turn clockwise.
II - FINAL OPERATION.
- Refit:
- the screen washer bottle filler neck (see 85A, Wiping
- Washing, Windscreen washer reservoir
neck: Removal - Refitting, page 85A-26) (12A,
Washing - Wiping),
- the air inlet sleeve (see Air filter unit: Removal -
Refitting) (12A, Fuel mixture).
DISCHARGE LAMPS
REMOVAL
I - REMOVAL PREPARATION OPERATION
1 - Direction indicator light, side light and
cornering light bulbs
- Remove:
- the air inlet sleeve to access the left-hand headlight
bulbs (see Air filter unit: Removal - Refitting)
(12A, Fuel mixture),
- the windscreen washer bottle neck to access the
right-hand headlight bulbs (see 85A, Wiping -
Washing, Windscreen washer reservoir neck:
Removal - Refitting, page 85A-26) .
2 - Discharge bulb
| IMPORTANT
To prevent burns, wait until the " computers -
power unit " assemblies are cold before removal. |
IMPORTANT
To prevent eye injuries:
- do not look at a discharge bulb when lit (voltage
when lit 20000 V),
- do not light a bulb which has not been fitted into
its headlight.
|
- Position the vehicle on a two-post lift (see Vehicle:
Towing and lifting) (02A, Lifting equipment).
- Disconnect the battery (see 80A, Battery, Battery:
Removal - Refitting, page 80A-3) .
- Remove:
- the front bumper (see Front bumper: Removal -
Refitting) (55A, Exterior protection),
- the headlight (see 80B, Headlights, Headlight:
Removal - Refitting, page 80B-1) .
II - REMOVAL OF PART CONCERNED
1 - Direction indicator bulb
- Remove the bulb holder (1) by turning it a quarter of
a turn anticlockwise.
- Remove the bulb (2) from the bulb holder.
2 - Side light bulbs
- Remove the sealing cover (3) by turning it a quarter
of a turn anticlockwise.
- Remove the bulb (4) from the bulb holder.
3 - Cornering light bulb
- Remove the sealing cover (5) by turning it a quarter
of a turn anticlockwise.
- Disconnect the cornering light bulb (6) .
- Unfasten clip (7) .
- Remove the cornering light bulb.
4 - Discharge bulb
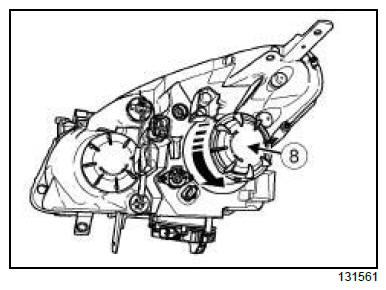
- Remove the sealing cover (8) by turning it a quarter
of a turn anticlockwise.
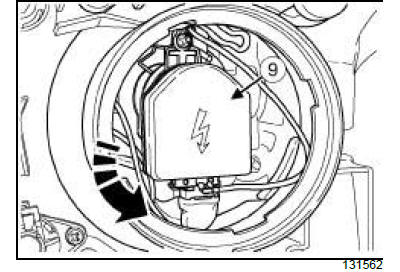
- Remove the capacitor (9) by turning it anticlockwise.
| WARNING
To prevent any breakages, handle the bulb by its
base. If you should touch the glass, clean it with
alcohol and a lint-free cloth. |
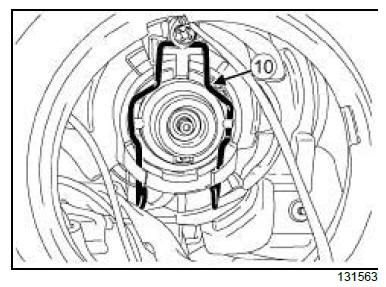
- Remove the bulb with caution, taking it by the neck.
REFITTING
I - REFITTING PART CONCERNED
1 - Direction indicator bulb
- Refit:
- an approved PY21W bulb in the direction indicator
bulb holder,
- the bulb holder on the headlight.
- Turn the bulb holder a quarter of a turn clockwise.
2 - Cornering light bulb
- Refit an approved H7 bulb on the headlight.
- Clip the clip onto the headlight.
- Connect the cornering light bulb connector.
- Refit the cover by turning it a quarter of a turn clockwise.
3 - Xenon bulb
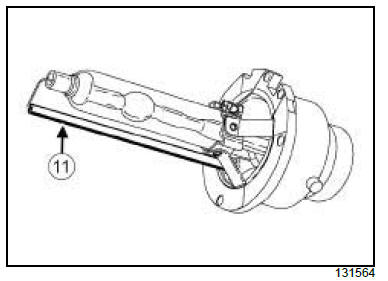
| WARNING
The bulb must be handled with care.
The external conductor (11) is very fragile and
must not be damaged. |
- Refit an approved D2S bulb on the headlight.
- Clip the clip onto the headlight.
- Refit:
- the capacitor by turning it clockwise,
- the cover by turning it a quarter of a turn clockwise.
II - FINAL OPERATION.
1 - Direction indicator light, side light and
cornering light bulbs
- Refit:
- the windscreen washer bottle neck to access the
right-hand headlight bulbs (see 85A, Wiping -
Washing, Windscreen washer reservoir neck:
Removal - Refitting, page 85A-26) .
- the air inlet sleeve to access the left-hand headlight
bulbs (see Air filter unit: Removal - Refitting)
(12A, Fuel mixture),
2 - Xenon bulb
- Refit:
- the headlight (see 80B, Headlights, Headlight:
Removal - Refitting, page 80B-1) .
- the front bumper (see Front bumper: Removal -
Refitting) (55A, Exterior protection).
- Connect the battery (see 80A, Battery, Battery: Removal
- Refitting, page 80A-3) .
- Adjust the headlights (see 80B, Headlights, Headlight:
Adjustment, page 80B-3)
|


