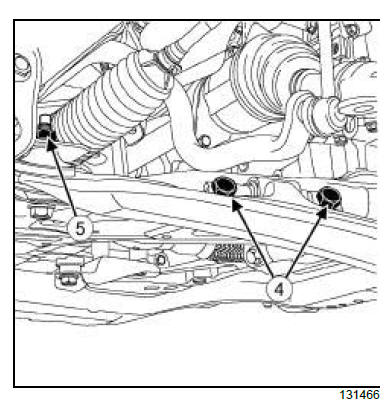
Renault Koleos Service Repair Manual: Front driveshaft lower arm: Removal - Refitting
Renault Koleos Service Repair Manual / Chassis / Front axle components / Front driveshaft lower arm:
Removal - Refitting
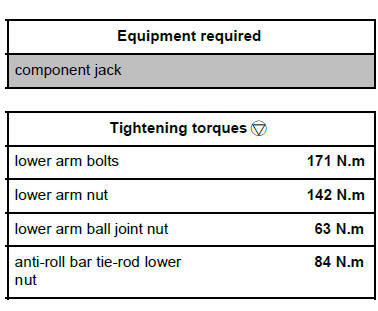
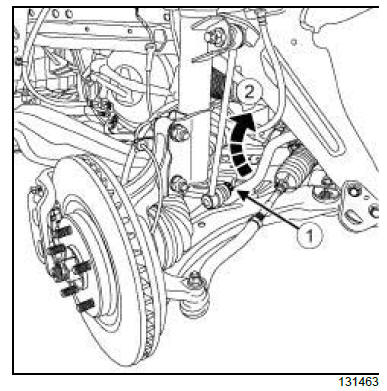
REMOVAL I - REMOVAL PREPARATION OPERATION
II - OPERATION FOR REMOVAL OF PART CONCERNED
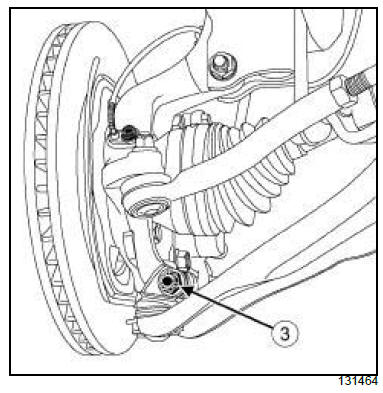
REFITTING I - REFITTING PREPARATION OPERATION
II - REFITTING PART CONCERNED
III - FINAL OPERATION.
|


See More:
Renault Koleos Service Repair Manual > Cruise control: Steering wheel switch:
Removal - Refitting
CRUISE CONTROL REMOVAL I - REMOVAL PREPARATION OPERATION IMPORTANT To prevent the pyrotechnic components from being permanently deactivated or triggered (airbags or pretensioners), wait for at least 3 min after disconnecting the battery. Disconnect the battery (see 80A, Battery, Battery: Removal - R ...
Renault Koleos Owners Manual
- Getting to know your vehicle
- Driving
- Your comfort
- Maintenance
- Practical advice
- Technical specifications
Renault Koleos Service Repair Manual

© 2018-2026 Copyright www.rkoleos.com
0.005